No-Stir Instant Pot Grits: Achieve Perfect Texture Every Time
Imagine a bowl of perfectly creamy, rich grits – steaming hot, ready to be topped with anything from a pat of melting butter to savory shrimp. Now, imagine achieving that perfection without standing over a hot stove, stirring constantly to prevent lumps or scorching. This isn't a dream; it's the reality of an
instant pot grits recipe. The Instant Pot transforms this classic Southern staple from a labor of love into an effortless culinary delight, delivering consistently outstanding results with minimal effort. Say goodbye to guesswork and hello to the creamiest, most satisfying grits you've ever made.
The Southern Staple, Reimagined for Modern Kitchens
Grits are more than just a dish; they're a cornerstone of Southern cuisine, deeply embedded in history and culture. Essentially, grits are dried corn kernels that have been ground into a coarse meal, then cooked to a thick, porridge-like consistency. Traditionally, making grits on the stovetop requires significant attention: constant stirring is key to breaking down the corn, preventing lumps, and ensuring a smooth, even texture. For many home cooks, this commitment of time and effort can be a deterrent, despite the undeniable deliciousness of a well-made bowl.
Enter the Instant Pot. This versatile kitchen appliance has revolutionized how we approach many time-consuming dishes, and grits are no exception. By utilizing high-pressure cooking, the Instant Pot effectively tenderizes the corn kernels and creates a uniform cooking environment that eliminates the need for continuous stirring. The result? A hands-off approach that yields profoundly creamy, lump-free grits with that coveted perfect texture every single time. It’s a game-changer for anyone who loves grits but dreads the work.
Understanding Grits: Not All Corn Is Created Equal
Before diving into our no-stir
instant pot grits recipe, it's helpful to understand the different types of grits available, as they impact cooking time, texture, and flavor. Choosing the right type is crucial for achieving that ideal consistency.
*
Stone-Ground Grits: These are the most traditional and arguably the most flavorful. Made by coarsely grinding whole dried corn kernels between millstones, stone-ground grits retain some of the corn's hull and germ, giving them a rich, complex corn flavor and a pleasingly chewy texture. They take the longest to cook using conventional methods, which is precisely why they benefit most from the Instant Pot's efficiency.
*
Hominy Grits: These are made from hominy, which is corn that has been processed with an alkaline solution (nixtamalization) to remove the hull and germ. This process changes the corn's flavor and makes nutrients more bioavailable. Hominy grits have a distinct earthy flavor and a slightly different texture than stone-ground.
*
Regular and Quick Grits: These are more finely ground and processed to cook faster. Regular grits have a medium grind, while quick grits are even finer. While they can be made in an Instant Pot for an even quicker meal, their texture is generally less substantial than stone-ground.
*
Instant Grits: These are the most highly processed, pre-cooked, and dehydrated. While incredibly fast to prepare, they generally lack the depth of flavor and creamy texture that stone-ground grits offer, making them less suitable for a recipe focused on "perfect texture."
For the ultimate creamy, perfect texture that our
instant pot grits recipe promises, we highly recommend using
stone-ground grits. Their robust nature stands up beautifully to pressure cooking, allowing them to fully break down into a luscious consistency without becoming mushy.
Unlocking Creaminess: Your No-Stir Instant Pot Grits Recipe
This
instant pot grits recipe focuses on simplicity and foolproof results. The magic lies in the hands-off cooking process, which allows the grits to slowly absorb the liquid and tenderize under pressure, creating an incredibly creamy foundation.
Ingredients:
* 1 cup stone-ground grits (or hominy grits)
* 4 cups water (or chicken/vegetable broth for a savory base)
* 1 teaspoon salt (or to taste, adjust if using salted broth)
* 2 tablespoons unsalted butter, plus more for serving
* 1/4 cup heavy cream or half-and-half (optional, for extra richness)
* Optional additions: shredded cheese, cooked bacon bits, pimento cheese
Step-by-Step Instructions:
1.
Prepare the Instant Pot: Add the water (or broth) to the inner pot of your Instant Pot.
2.
Add Grits and Salt: Carefully pour in the stone-ground grits and then the salt. Give it a gentle stir
just once to combine the ingredients. Avoid vigorous stirring, as this can encourage grits to settle and potentially stick to the bottom or interfere with pressure building.
3.
Secure and Cook: Secure the lid on your Instant Pot, making sure the sealing vent is in the "Sealing" position. Select the "Manual" or "Pressure Cook" setting on HIGH pressure and set the timer for 10 minutes.
4.
Natural Pressure Release: Once the cooking cycle is complete, allow the pressure to release naturally (NPR) for 15 minutes. This step is crucial for the grits to fully hydrate and for the starches to break down, contributing significantly to their creamy texture and preventing them from spitting out of the valve if you quick-release too soon. After 15 minutes, you can carefully turn the sealing vent to the "Venting" position to release any remaining pressure.
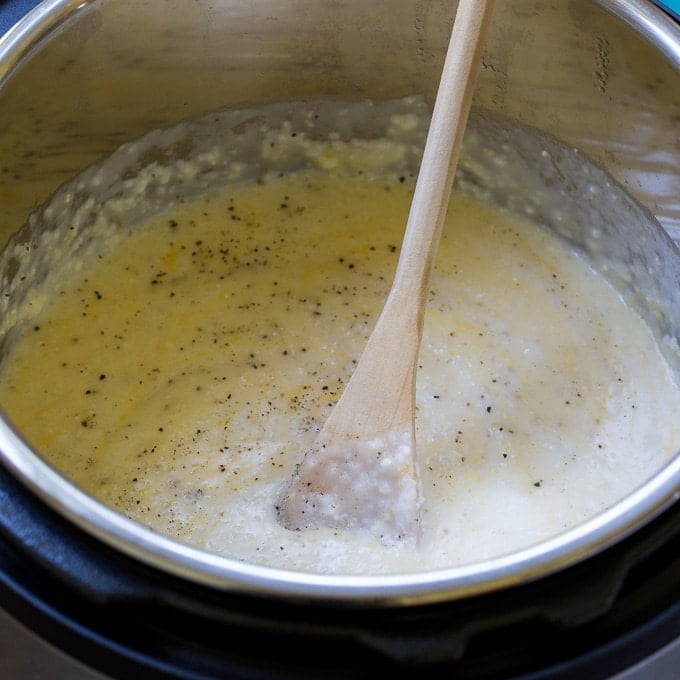
5.
Finishing Touches: Carefully remove the lid. The grits might look a little loose or watery on top, but don't worry. Add the 2 tablespoons of butter and the heavy cream or half-and-half (if using). Stir vigorously with a whisk or spoon until the butter is melted, the cream is fully incorporated, and the grits are wonderfully smooth and creamy. This is where you activate that final perfect texture!
6.
Serve: Taste and adjust seasoning if needed. Serve immediately, topped with additional butter, shredded cheese, or your favorite savory accompaniments.
Pro Tip for Consistency: The 1:4 ratio of grits to liquid is standard for a medium-thick consistency. If you prefer your grits slightly thicker, reduce the liquid by 1/4 to 1/2 cup next time. For a thinner consistency, you can always whisk in a splash more warm water, milk, or broth at the end.
Beyond Breakfast: Versatile Pairings and Flavor Innovations
One of the greatest joys of grits is their incredible versatility. While a simple bowl with butter and a fried egg is quintessential breakfast, these perfectly textured Instant Pot grits can anchor a meal at any time of day. The neutral, creamy base makes them a fantastic canvas for both savory and even sweet creations.
Savory Grits Sensations:
*
Classic Cheese Grits: A perennial favorite! After adding the butter and cream, stir in 1/2 to 1 cup of your favorite shredded cheese. Sharp cheddar is excellent for breakfast or brunch. For a more sophisticated pairing with fish or seafood, consider Gouda, Gruyère, or Parmesan. The residual heat from the grits will melt the cheese into a luxurious, gooey dream.
*
Shrimp and Grits: This iconic Southern dish truly shines with our Instant Pot recipe. The creamy grits provide the ideal bed for succulent, garlicky sautéed shrimp. For more ideas on how to craft this Southern classic easily, check out our guide on
Easy Instant Pot Grits: Creamy Southern Favorite in Minutes.
*
Pimento Cheese Grits: A Southern delicacy! Stir in about 1/2 cup of prepared pimento cheese at the same time you add the butter and cream. The pimento cheese melts beautifully, infusing the grits with its tangy, cheesy, peppery flavor.
*
Bacon-Infused Grits: For a hearty start, stir in crumbled cooked bacon along with some cheese at the end. The smoky, salty crunch adds a wonderful dimension.
*
Roasted Vegetable Grits: Top your creamy grits with a medley of seasonal roasted vegetables – asparagus, mushrooms, bell peppers, or cherry tomatoes – for a wholesome and flavorful vegetarian meal.
*
Pulled Pork or BBQ Grits: Use grits as a rich, comforting base for BBQ pulled pork or chicken. The flavors marry beautifully.
Sweet Grits Delights (A Less Common, But Delicious Twist):
* While savory is traditional, grits can also be enjoyed sweet! Serve with a drizzle of maple syrup or honey, a sprinkle of brown sugar, fresh berries, and a dash of cinnamon. This transforms them into a hearty, comforting breakfast porridge.
Experimenting with these additions allows you to customize your grits to perfectly complement any meal. The reliability of the Instant Pot means you can focus on the toppings, confident that your grits base will be flawless every single time. To explore even more ways to enjoy your perfectly cooked grits, dive into
Master Instant Pot Grits: Fast, Versatile, and Deliciously Creamy.
Troubleshooting Common Grits Issues (Instant Pot Edition)
Even with the Instant Pot's reliability, a few minor hiccups can occur. Here’s how to address them:
*
Grits Stuck to the Bottom: This usually happens if the initial stir was too vigorous, or if you scraped the bottom after adding grits and before cooking. Ensure you only give a gentle stir initially and let the Instant Pot do its work.
*
Too Thick: If your grits are thicker than desired after the natural release and stirring, simply whisk in a splash more warm water, milk, or broth until you reach your preferred consistency.
*
Still Lumpy: The Instant Pot significantly reduces lumps, but if you still find some, whisking vigorously after adding the butter and cream will usually smooth them out. A stick blender can also be used briefly for an ultra-smooth consistency if desired.
The Effortless Path to Grits Perfection
The
instant pot grits recipe is a true game-changer for anyone who appreciates the rich, comforting taste of grits but shies away from the traditional fuss. By harnessing the power of pressure cooking, you can achieve a consistently creamy, lump-free texture with virtually no stirring required. Whether you’re pairing them with a simple breakfast, an elaborate shrimp and grits dinner, or exploring unique flavor combinations, the Instant Pot makes grits perfection accessible and effortless. So, embrace the ease, unlock the flavor, and make this no-stir recipe a staple in your kitchen. Your taste buds (and your stirring arm) will thank you!